January 2017 - Q's Kitchen

The Ultimate Porridge


It's nearing the end of the working week and I am ridiculously exhausted - 'throw a mini pizza into the oven because you can't cook' kinda tired, and if there's one thing you know about me is that I love to cook, so obviously this is a catastrophe. But if I have to name one redeeming thing about this week (in terms of food of course) then it has to be that I made a big batch of my Ultimate Porridge one morning and so far breakfasts have been amazing.
Now I'll be honest, I've only quite recently gotten into eating porridge and this is because I finally figured out a method to making my ideal porridge as opposed to a gloopy mess. 
By gloopy mess I'm referring to all the ghost's of bad porridges past, this goes as far back as childhood - I remember not liking it despite the whole Goldilocks and the three Bears aspect and now in recent years where my tastes have evolved from food in boxes with cartoon characters on the front (I still like Coco Pops though) I found myself really wanting to venture into porridge territory.  
I tried all sorts of recipes mostly resulting in an austere gruel, not even Oliver Twist would have said 'please sir, can I have some more', I also tried some shop-bought mixtures and the over-night oats that everyone raves about but it just wasn't to my liking. 
Then during attempt number a hundred and something (I exaggerate) I ended up added 'too much' milk and leaving it to cook a bit too long but the end result was great!
A fine, smooth porridge which just the right amount of texture.
Now everyone might have different preferences but give this recipe a go and you may be pleasantly surprised! When I say recipe, its actually more of a method i.e. cooking times/what to look for at different stages throughout the process etc, rather than exacting quantities - this means you can adjust to make one bowl just for you or an entire pot full (just for you).

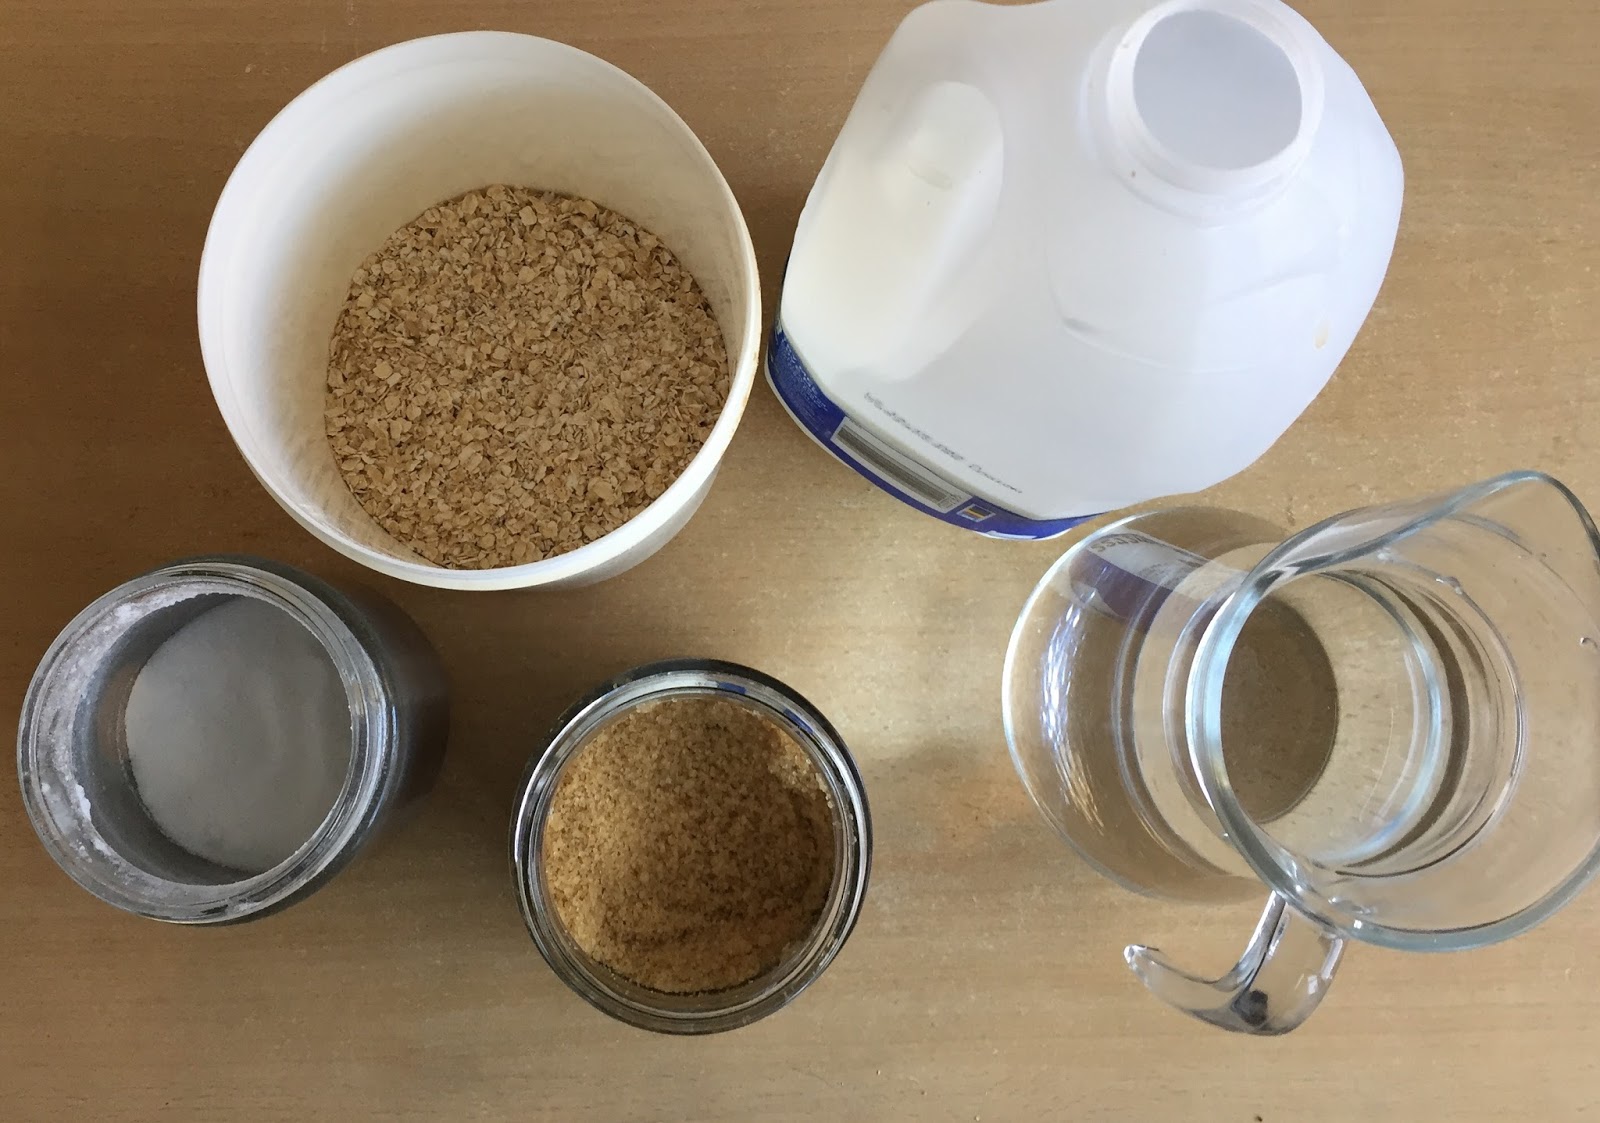
So to make this, you will need a few very basic ingredients:
Porridge oats, water, milk, your choice of sugar, cinnamon, cardamon & toppings! but we'll get to that later  
To start with put a saucepan onto the hob and add in your water. Let this simmer on medium heat whilst you pop in some cardamom and allow the water to infuse with the flavour - I love adding this spice to a lot of dishes because its aromatic and adds a subtle warmth (try it your chai next time!)
Once the water it suitably bubbling simply pour in your oats.
Then whisk, whisk, whisk! Make sure that the heat isn't on too high and as you whisk your notice everything getting thicker. 
The trick here is to cook it for a few minutes, if you don't I end result is a slightly stodgier porridge.
Now just pour in your desired quantity of milk and of course remember to keep whisking, this ensures that there are no clumpy bits.
Don't forget the cinnamon, my favourite winter spice alongside cardamom of course & a tablespoon of brown sugar.
Once everything is in there you need to let it simmer further, that's the key to the ultimate porridge, letting it all cook slowly and steadily because this creates a creamy, silky base. 
Once the milk starts to rise give it a last quick stir, turn of the heat, pop on the lid and you are done!
As for the toppings, you can go with what ever your heart desires but this is one of my favourite combinations. 
Sliced banana for a creamy sweetness, cranberries add a sharp flavour, a scattering of almonds for crunch, a drizzle of raw honey for more syrupy sweetness and finally a sprinkle of cinnamon. 
The perfect breakfast for a bright frosty morning!
😋
Enjoy!
Q x

Grilled Bell Peppers stuffed with Couscous

Hello!
It's currently early Sunday afternoon and I have already cooked breakfast, showered, cleaned, been grocery shopping, checked my instagram & twitter, read stuff, did some washing, made a few calls, started on dinner etc. Phew. I think I may just need a nap (jk, I'm not one of those people who are able to sleep during the day!), but my point being that I have been pretty busy. 
So when it comes to lunch on busy days (aka every weekday and some weekends), I want something filling, delicious but more so, easy and quick to prepare. Nothing worse that labouring over the stove when you're exhausted, also I don't even feel like eating food that I haven't enjoyed preparing!
That's why I'm trying to expand my repertoire of quick & easy meals - been watching Jamie Oliver's five minute meals for inspo and research purposes (is it only me that feels full after cooking shows?!).
However I already have a few go to meals that I've been making for ages that fulfil the criteria, 'couscous stuffed bell peppers' being one such example! I actually love couscous, its an easy substitute for rice and when flavoured well, tastes amazing. 
I remember looking up some recipes for a pepper/couscous meal but quite a few required oven cooking and I wasn't a fan so instead I thought to grill and have done so ever since.

So to make this, you will need a few ingredients:
  1. Red bell peppers
  2. Cherry tomatoes
  3. Olive oil
  4. Mature cheddar cheese
  5. Couscous
  6. Basil leaves, paprika, vegetable stock cube
To start with grab your red bell peppers (red because this is the sweetest/juiciest type of pepper and they contain the most nutrients!) and slice them in half length ways, if you have the option then select the most shapely (lol) or rounded peppers, I had to make do with what I had.
Place the pepper halves face down on to a lined baking sheet and brush with some extra virgin olive oil, then pop the tray into a heated grill for about five minutes.
Meanwhile we can start on the filling; in a box add two scoops (1 cup) of couscous, half a tsp of paprika, a quarter of a vegetable stock cube, a generous squeeze of lemon juice, mixed herbs, garlic powder and if your couscous doesn't already contain it also add in some sun-dried tomato and onion.
Then top this with boiling water so that the water line lies half an inch above the couscous - give this a quick mix with a fork and pop the lid onto the box. Leave it shut until it is required.
After a few minutes remove the lid, fluff up the couscous and have a quick taste to adjust spices/flavouring (resist the urge to eat it all!)
At this point chop up some cherry tomatoes and grate some mature cheddar - you could also use mozzarella. I also prepped my super simple side salad of lettuce, cucumbers and roasted tomatoes with a lemon vinaigrette.
At this point remove your peppers from the grill, they should be slightly charred but still stiff enough to maintain their structure (also at the last minute I threw in a few tomatoes to grill!)
Turn the peppers the right way round, fill with the couscous mixture, add the cherry toms on top followed with the grated cheese and a sprinkle of shredded basil. 
These then go back into the grill for five minutes until everything is well roasted and the cheese has melted.
Serve straight away with the accompanying sides, for me it was the salad and some peri-peri seasoned fries.
I'm getting hungry looking at these pictures, I hope you give this recipe a go because it was yum!
😋
Enjoy!
Q x

My Mocha Marble Madeira Cake ♡

Hello!
(◕á´¥◕)
It's Friday and I'm grateful, and no its not that I necessary restrict my gratitude to one day of the week (aka the start of the weekend!), but I am prone to a little bit of complaining every now and then (oops). That's why I decided a few weeks ago that I was going to make a conscious effort to be more positive, as in waking up in the morning and being like 'hell yeah, I got this!' rather than 'oh no, let me go back to bed'- its a work in progress, but I'm doing alright. 
So I'm grateful for a lot of things; my family and friends, the fact that I have a roof over my head and a warm home, that I'm living, breathing and all that good stuff. Ø§Ù„حمد لله Oh and on a lighter note, today I'm also grateful for my clothes order that arrived, the fact that I have no exams (not envious of my uni friends sitting January exams), my new books and this incredible cake and custard I have in front of me (the little things count too, okay?)
Now without blowing my own trumpet, this cake is really good. 
The reason I say that is because I initially started out with a cookbook recipe but I ended up tweaking so many things that by the time I was done it was unrecognisable. So when I put it into the oven I was thinking that this may turn out quite wrong, but alas that wasn't the case! In fact I like the result enough to share it with you lovely people, bonus. 
Now for a little bit of back story - my dad (who loves Madeira cake) was convinced that it originated from Portugal and that settlers brought it over here. Instead it turns out that it comes from much closer to home, not quite so exotic. Either way I was 'commissioned' (lol) to recreate this cake and I thought to put a twist to the traditional by introducing marbled coffee/chocolate (mocha!) to the plain madeira and so this recipe was born. 

To make it you will need a few ingredients:
  1. 175g caster sugar
  2. 175g butter / Margarine
  3. Three eggs
  4. 250g self-raising flour
  5. 1/2 tsp baking powder
  6. Lemon
  7. Vanilla flavouring
  8. Powders - coffee / cocoa / mocha
To start with preheat your oven to Gas Mark 4, then measure out the butter/margarine (you can use entirely butter or entirely margarine or as I prefer, half and half; the marg lends a lighter springy texture to the sponge whilst the butter offers moisture and flavour) 
To this add in your caster sugar and cream both ingredients together   using a hand/stand mixer (or a good old wooden spoon) until light, fluffy and well combined.
Mix in one teaspoon of vanilla flavouring aka vanilla essence
Now crack in the eggs one at a time whisking well after each addition. A small tip - add one tblsp of flour with the final egg to stop the mixture from curdling.
Now back to the self raising flour, we require 250g of the stuff to be sifted into mixture.
Side note, I ran out of flour upon measuring out 124g and had to wait for at least thirty minutes before I got some more! 
When you finally have the right quantity of sieved flour, tip it into your mixture along with a 1/2 tsp of baking powder and give this all a good stir using a wooden spoon.
Now for the chocolate powdery goodness! Grab your coffee and cocoa powder, I used the Bournville one because its great.. also look at my vintage cocoa shaker, not actually vintage but I adore the way it looks, I use it to sprinkle cocoa on to my whipped cream hot choc!
I also used some mocha chocolate powder that I got from Harrods, once again isn't the tin just so pretty. Yeah, I have a thing for nice packaging and containers, oh and crockery
It was also raining whilst I baked this cake, my favourite baking weather, how melancholic. 
Anyway, back to the recipe! Add about 2 1/2 tblsp of the cocoa powder along with 1 tsp of coffee granules and 1 tsp of mocha powder. Then pour in enough boiling water that upon stirring results in a thick chocolatey paste. 
Then take a little over a third of the cake batter and mix the chocolate paste into it, until everything is well combined. There is no exact measurement of cake batter to add at this point so feel free to add more or less depending on the amount of chocolate you want in you cake.
Now back to the plain batter - add half a lemon's worth of zest and a good squeeze of fresh lemon juice, give everything a final mix.
And now for the penultimate and most exciting stage (apart from the eating!), add spoonfuls of your mixture to your lined cake tin, alternating with chocolate and plain batter. You can layer or dollop the batter in like I did, the reason being that I wanted the chocolate to mostly be at bottom with a plain top so that when you cut into into - surprise!
Then using a skewer swirl the mixture around to create the marble effect.
Pop the tin into the oven and cook the cake until golden brown and an inserted skewer comes out clean, around 30 minutes although I never set a timer, just keep an eye on the cake and take it out when I feel that its ready.  
Leave it to cool in the tin for a short while and when you can wait no longer, slice up and consume! Or if you going to give it to someone, attempt to exhibit strong self-control until it falters and eat it anyway
You can eat it any way you like, serve with cream and a sprinkle of cocoa or submerge like a cake ship sinking in a sea of hot custard.
😋
Enjoy!
 Q x