Q's Kitchen: Chocolate
Showing posts with label Chocolate. Show all posts

Chocolate Orange Cream Cake

It was November--the month of crimson sunsets, parting birds, deep, sad hymns of the sea, passionate wind-songs in the pines. Anne roamed through the pineland alleys in the park and, as she said, let that great sweeping wind blow the fogs out of her soul ― L. M. Montgomery

I remember borrowing Anne of Green Gables from my high school library many years ago and devouring it over the course of a few evenings. As for this particular line from the book, I came across it again recently and I love it - it captures the essence of one my favourites times of year perfectly. And now December is upon us and we must bid it adieu, its been a blast.
Almost literally considering bonfire night, we had a spectacular firework display and all the sparklers and chocolate you could wish for. Although it was a bit of a jam-packed evening as I took my sisters to a book signing earlier on, it was to meet Ransom Riggs,  author of the Miss Peregrines books - we got signed copies of his latest instalment in the series, A Map of Days.
November, or Rabi ul-Awal which is the Islamic month based on the lunar calendar brought with it Eid Milad un Nabi a beautiful festival of celebration and light. Every celebration calls for cake, so I made this one flavoured with chocolate and orange. 
Tangy citrus and rich, dark chocolate is a true and tested flavour combo that works really well. Just try a Terry's Chocolate Orange if you need convincing.. speaking of, I visited Goddard House last summer, the former estate of the Terry's family, it has beautiful gardens, some interesting (vintage chocolate related) displays and you can see the old factory across the river. 

Now back to this amazing cake, it features a moist rich sponge with flecks of orange flavour and a double cream citrus topping, with more chocolate and orange of course! The other great thing about this cake is that it is so easy to make - an all in one method, you add all your ingredients to a bowl, mix, into the oven and voila. I guarantee you that this will be your go-to chocolate cake recipe from here on out, it's that easy and delicious.

So to make this Chocolate Orange Cream Cake, you need the following ingredients:
Cocoa Powder
Caster sugar
Margarine/butter
Eggs
Self-raising flour
Baking powder
Milk
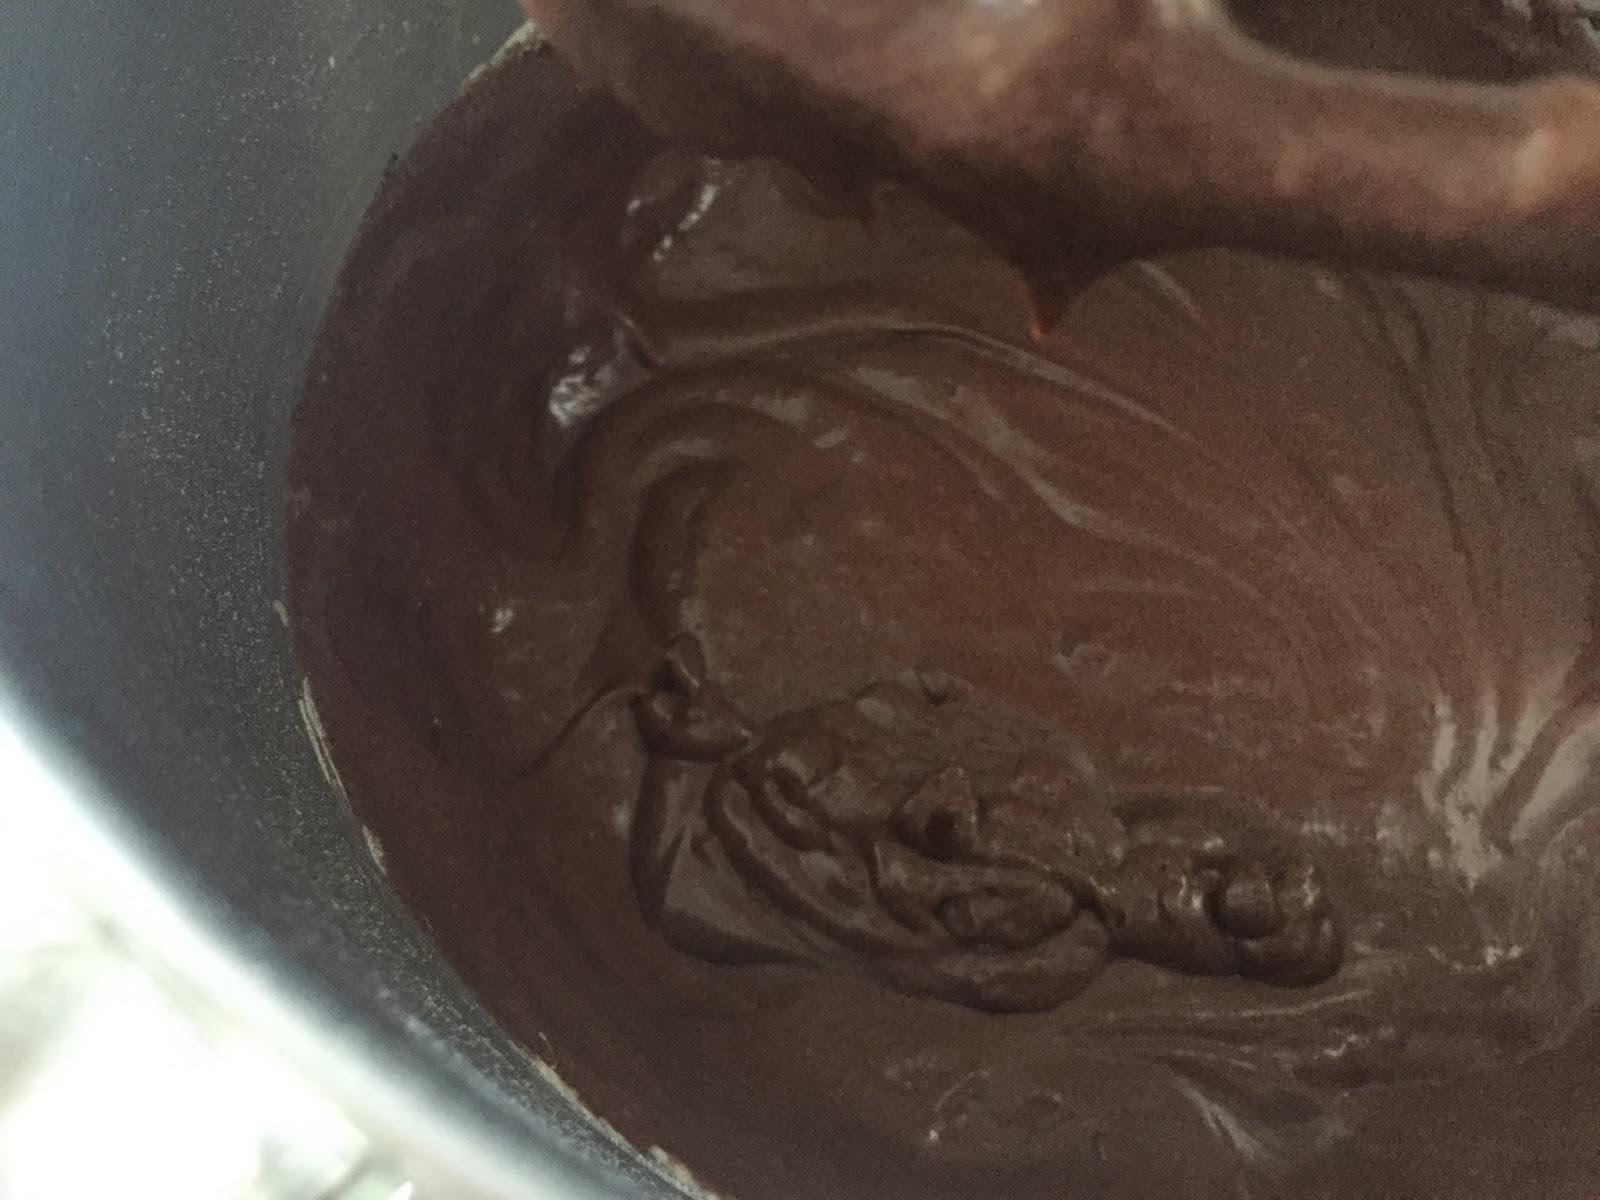
Begin by adding 50g of good quality sifted cocoa powder into a bowl and stir in enough boiling water until a forms a thick chocolate paste.
To your mixing bowl add in the remaining ingredients - 100g butter/margarine, 275g caster sugar, 3 large eggs, 175g self raising flour, 1 rounded teaspoon baking powder and 50ml of milk.
Finally add in the chocolate mixture and beat until well incorporated and you have a thick, smooth batter.
Stir in the grated zest of one orange. You can add a dash of orange juice or orange essence if you want to enhance the flavour.
Spoon the mixture into a lined loaf tin (or two sandwich tins) and bake in a preheated Gas Mark 4 oven for around 30 minutes or until  well risen and springy to the touch.
To make the cream topping, whip up some double cream along with icing sugar (add a tablespoon at a time until it reaches the desired sweetness), grate in some orange zest.
Once the cake has completely cooled, spoon on the orange cream - I went with a more rustic effect but you can pipe it if you wish. Also if you opted to make the cake in circular tins, sandwich the layers with orange cream and decorate the top as mentioned above. 
An easy and delicious recipe for a chocolate cake which can easily be modified to create other flavours e.g. chocolate and hazelnut or raspberry and chocolate.
😋
Enjoy!
Q x

Cookie Dough Cups [and a giant cookie]

I woke up to a white sky today, a cold room because I hadn't closed my window the night before and the wish to stay under the covers for as long as possible. Not long at all it seems, thanks to the incessant phone ringing; calls from across the continent.
But its all good now, I have my mug of green tea and honey, a slice of cookie, my back is toasty from the warmth of the radiator and my heart is happy from some good news I just heard.
More on the cookie? It's a slice from a giant one I baked yesterday afternoon alongside some cute little cookie cups. The objective was to make some cookie dough à la Pizza Hut, but with time constraints and a little bit of spontaneity these cookie cups were conceived and they are real good
I have a memory of a big family meal we went on years ago where my cousin ordered a portion of cookie dough with ice cream, we all had a taste and thought it was the best dessert ever, since then I've had a few and its never been as good. 
Although yesterday this little rush job appears to have created something even better - these cookie cups are soft in the middle, slightly chewy on the outside, sweet but not overly so and speckled with flecks of dark chocolate. They are also very easy to whip up and the cookie dough can also be used to make giant cookies!

So to make the Cookie Dough you will need the following ingredients: 
White sugar
Brown sugar
Butter
Egg
Self-raising flour
Chocolate
Vanilla essence [optional]
Begin by beating together 125g of butter, 90g of white sugar (caster is preferable but I didn't have it to hand) and 90g of brown sugar in the bowl of your stand mixer until well combined. This can also be done using a hand mixer or a trusty bowl and spoon.
Next add in 1 egg and a tsp of vanilla essence if using.
Chop up around 90g of chocolate, this can be dark chocolate as pictured, or milk chocolate. You can also substitute for chocolate chips if desired.
To the mixture add 225g of self-raising flour, 1/2 tsp of salt if you didn't use salted butter and the chopped chocolate. Mix together thoroughly until you get a sticky dough-like consistency.
Line your muffin tins (this makes for easier removal afterwards), take a tablespoon or so of the dough, roll and press in the palm of you hand until it form a disc then lightly press this into the case. Ensure that there is a slight dip in the middle but there is not need to bring the dough all the way up the edges of the case. 
If making a giant cookie, line a pie or tart tin then press the dough into the tin ensuring a flat surface and that it reaches the edges. Note that it may be sticky to start of with but should smoothen out after pressing.
Bake the cookies at Gas Mark 6 from 8 minutes, then reduce the heat to Gas Mark 4 and continue baking for a further 7 minutes. Keep and eye on the cups as you don't want them to get too dark. Once they are baked take them out of the oven, whilst they are cooling the middle should dip slightly.
The cookie dough cups can be eaten whilst still warm but have an amazingly soft and chewy texture even when cool.
Serve with vanilla cream and a drizzle of chocolate (which I didn't have time for!)
As for your giant cookie, slice and serve the same way. Or if you want to go all out, make a cookie pizza - a chocolate sauce and toppings of your choice.
😋
Enjoy!
Q x

Chocolate and Vanilla Frosted Fairy cakes

I'm definitely craving warmer weather now; Christmas has passed and it was a decidedly cosy affair, although I was working Christmas Eve, during the day we had a roast dinner and watched a hell of a lot of movies. The snows from the past few weeks are somewhat of a distant memory, the nights have finally started to get longer and I've ultimately excepted that the end of the year is pretty much here (I think this year passed by far too quickly). I always feel quite melancholy come late December, but right now I'm counting my blessings and Ø§Ù„حمد لله its all good. Speaking of, we have a wedding to go to later tonight and I'm yet to locate my dress, but I'm still hoping to whip up a batch of these fairy cakes before all that #priorities. 
This is a standard Mary Berry recipe, meaning that its both quick and easy to make - she literally says that in the recipe header and I can confirm that is an accurate statement. Funnily enough I ended up getting a second copy of her '100 Recipes' book as a Secret Santa gift, I guess I unknowingly exude MB fangirl vibes (p.s. might do a little baking giveaway soon, follow me on Instagram to find out). Her recipe also indicates that these cakes are 'very effective for a children's party', so grab some children, throw a party and eat cake (or skip the first two steps, they'll taste good either way). I remember that a constant feature on the menu at our kiddy parties was decorated cupcakes, pilled with lots of Jelly Tots, chocolate and 100s & 1000s. These were the shop-bought bakers dozen cupcakes because ain't nobody got time for baking back then. Although this recipe is so easy I don't see why not! another noteworthy observation is that I opted for a more subdued colour palette and flavour profile (no offence to Jelly Tots), even though the rustic hand-made appearance is ever present. 

So to make these Chocolate and Vanilla Frosted Fairy cakes you will need the following ingredients:
- Margarine
- Caster sugar
- Self raising flour
- Eggs
- Baking powder
- Milk
- Vanilla essence/extract
- Cocoa powder
For this double batch of 24 fairy cakes begin by measuring out 200g of margarine and 200g of caster sugar. Beat both together until pale and fluffy.
Crack in four large eggs and mix until well incorporated (take care not to overbeat, the mixture may curdle at this stage but the addition of one spoon of flour can amend this).
Sift in 200g of self-raising flour and 2 level tsp of baking powder, along with a dash of milk to loosen up the mixture. Mix until well incorporated.
To make the chocolate fairy cakes, in a separate bowl mix together 2 tblsp of cocoa powder and 3 tblsp of hot water.
Add half of the cake batter and stir until mixed. To the remaining half mix in 1 tsp of vanilla extract.
Spoon the batter into paper cases fitted into a bun tin - fill each case until 3/4 full.
Place into an oven preheated to Gas Mark 6 and bake the fairy cakes until well risen and springy to the touch (approximately 15-20 minutes). Take out of the oven and leave to cool on a wire rack.
To make the vanilla frosting measure out double the amount of icing sugar to butter (200g sugar - 100g butter), then beat until pale and well blended. The longer you beat it for the better.
As for the chocolate frosting, dissolve 2 tblsp of cocoa powder in 3 tblsp of hot water, then as with the other frosting beat together 200g of sugar and 100g of butter. Stir in the chocolate mixture.
Spoon or pipe the frosting onto the cooled fairy cakes.  
Decorate with sprinkles, chocolate chips, edible glitter (or Jelly Tots!) - boxed up these fairy cakes also make a pretty homemade gift.
😋
Enjoy!
 Q x  

Chocolate Chip & Orange Cake

I have officially succumbed to my winter state (even though its still autumn) as we saw the first frost this morning and I also feel perpetually cold and so we bid adieu to all things summery and welcome in the knitwear and cosy baking season. I will say however I think its a little early to be putting up the fairy lights and Christmas tree, no joke but I know of more than a handful of people who have done so and that's not including the high-street shops, but I guess I excuse the rampant consumerism and excessive commercialisation of festivals because its adds to the fun.
Speaking of celebrations, remember remember the 5th of November, one of my favourite nights of the year. We had a big firework display in the garden and lots of people came round, there was a mini bonfire and popcorn, chips and pakoras oh and sparklers and cold noses and hot chocolate. The firework 'competition' with the neighbours and the noisy night and smog filled morning that follows - the usual traditions.
Unfortunately I didn't get round to baking anything, but if I had it would have been this chocolate and orange cake because what goes better with hot chocolate than a slab of warm, chocolaty, citrusy cake. This cake recipe is actually a spin of my usual lemon drizzle loaf which means its super fluffy and light but this time its loaded with chocolate chips and a subtle orange flavour. 

So to make this Chocolate Chip & Orange Cake you'll need the following ingredients:
- Butter or margarine
- Caster sugar
- Self raising flour
- Eggs
- Baking powder
- Milk
- Oranges
- Chocolate
Begin by creaming together 113g of butter/margarine and 113g of caster sugar until light and fluffy. Note that these amounts are suitable for a loaf cake, double up the recipe for a larger cake. 
Add in 2 eggs beating well after each addition, then grate the zest of one large orange and add this to the mixture.
Juice the same orange and stir this into the batter, in a pinch this can be substituted for pre-bought pure orange juice. 
Next sift in 138g of self raising flour and 1 tsp of baking powder along with 1 and 1/2 tblsp of milk. If wishing to omit the milk then just substitute for additional orange juice. 
Chop up a generous amount of chocolate (about 60g), if wanting more even sized chunks then opt for chocolate chips. Stir this into the cake batter but set some aside.
Spoon the batter into a lined loaf tin and top with the remaining chocolate chunks.
Place this into an oven preheated to Gas Mark 4 and bake for until golden brown and springy to the touch.
Once it comes out of the oven drizzle the top with some freshly squeezed orange juice and allow this to soak into the cake. 
 Serve with hot chocolate, orange slices and a good TV show (by the way, was anyone else disappointed with the GB Bake Off finale? I found it incredibly boring and that's not because I already knew who the winner was - thanks Prue!)
😋
Enjoy!
 Q x  

Pecan Chocolate Brownies

This year marked the first time I ever made brownies. I'm not too sure why but I always approached 'chocolate baking' with slight trepidation, maybe because its such a strong flavour that it'll turn out delicious or not so (also I'm not the biggest chocolate fan, I have to admit). However, I have overcome this small cooking hurdle of mine due to my little brother's insistence that I never make food he likes aka chocolate flavoured anything. 
Thus began the mission to create a decent brownie and after searching high and low and surfing (or should I say sifting) through a ton of recipes, this one caught my eye and it was love at first bite. Chewy, fudgy, melty and of course chocolatey - these are the ideal brownies, also they're ridiculously easy to make, I didn't even have to bring out the stand mixer, just a bowl and some good old elbow grease (disclaimer: other utensils and ingredients required!)
Funnily enough I ate some of these brownies with tea from a flask on a sand dune, which I highly recommend. This was on a day-trip to the coast and these brownies tasted particularly good after trekking across a windy beachfront and walking through pinewoods where the red squirrels live. Although I know that they will taste just as good cosied up on the sofa with blankets and a mug of tea.

So to make these pecan chocolate brownies you will need the following ingredients:
- Margarine (or butter)
- Eggs
- Granulated sugar & brown sugar
- Plain flour
- Cocoa powder
- Vegetable oil
- Chocolate; milk/dark
- Pecans
To began with melt 230g of margarine in the microwave in a heatproof bowl, to this add 180g brown sugar, 240g granulated sugar and 2 tablespoons of vegetable oil and beat until well incorporated. The oil ensures the brownies stay soft and moist.
Crack in 4 eggs and 1/2 tsp of salt, whisk until the mixture is even in colour. The salt is optional but recommended as it enhanced the chocolate flavour, similarly you can add in around 3 tsp of vanilla if desired.
Then sift in 150g plain flour and 115g unsweetened cocoa powder, fold into the wet ingredients until well mixed but take care not to over beat the mixture as it can result in tough brownies.
 Chop up around 150g chocolate and 120g pecans - alter the amount depending on your preference. You can use milk, plain or white chocolate and substitute walnuts for the pecans.
Fold this into the brownie batter but set some aside to sprinkle on top. Note that the mixture will be very thick, this is to be expected.
Spoon and spread the batter into a greaseproof paper lined baking tin - use whatever tin you have but note that the smaller it is, the taller/thicker the brownies will be. Sprinkle on the chopped nuts and chocolate.
Place the tin into a oven preheated to Gas Mark 4 and bake for 30-35 minutes.
The amount baking time required will vary depending on your oven, but as a reference the tray should be removed from the oven once the top looks cooked and when touched it is well set. Take care not to over-bake as this will change the texture of the brownies. Leave in the tin to cool for around 15 minutes.
Chop into squares or cut smaller pieces to create brownie bites. These taste delicious with vanilla icecream, cold milk, whipped cream or hot tea.
I hope you give this recipe a try! Oh and here's a snap of the coastal pinewoods because look how pretty.
😋
Enjoy!
 Q x  
*recipe adapted from Gemma's Bigger Bolder Baking